
Shooting the Moon and assembling an HDR image
The moon is the only natural satellite of the Earth and the fifth largest satellite in the Solar System. The moon is an object of study for astronomers and researchers, attracting attention as a symbol of romance and mystery. Today we will talk about how to photograph and process the moon. We will not discuss shooting the Moon in the landscape — this is a topic for a separate conversation. Instead, let’s focus on the moon itself as the subject of the survey.

For photography, you will need a camera, a lens and a tripod or a mount (a device that compensates for the daily rotation of the Earth).
Camera
Everything is simple with the camera, any DSLR or mirrorless camera with interchangeable optics will do.
The lens
Any telephoto lens will do for a start. 200 mm won’t be enough, but 500-600 mm is just right. Of course, the ideal option would be a telescope, preferably with an aperture of at least 100 mm. Personally, I use a Soviet MTO-1000A SLR lens with a focal length of 1100 mm and an aperture of 110 mm. Some Soviet-made mirror-lens specimens are distinguished by their soap-like image, but I was lucky enough to get a “sharp” specimen for a ridiculous amount of 11tr for such a focal length.
Tripod
The moon is a very bright object, especially in phases close to the full moon, so there is no need for long exposures, and accordingly, there are no special trackers and mounts to compensate for the daily rotation of the Earth, you can shoot from a fixed tripod, but you will have to regularly “adjust” the camera so that the Moon does not creep out of the frame. This is not very convenient (especially with a ball head) and can subsequently negatively affect the result of addition, but for a start it is the most affordable option. Personally, I most often use a fixed tripod with an ordinary ball head.
Our goal is to capture as many frames as possible (we take photos, of course RAW, not video) in order to increase detail and reduce noise, just like in deep sky astrophotography. In addition, we need to remove the material for the HDR assembly, that is, the glow of the Moon at a longer exposure.
Shooting

We catch the focus in manual mode (it is undesirable to trust autofocus, although it will most likely get where it needs to be, but it is better to control this process), slightly tighten the aperture, set the shutter speed to no longer than 1/100–1/200, adjust the ISO so that there is no overexposure, and shoot a series of frames, the more — the better — I I try to take at least 500 photos.
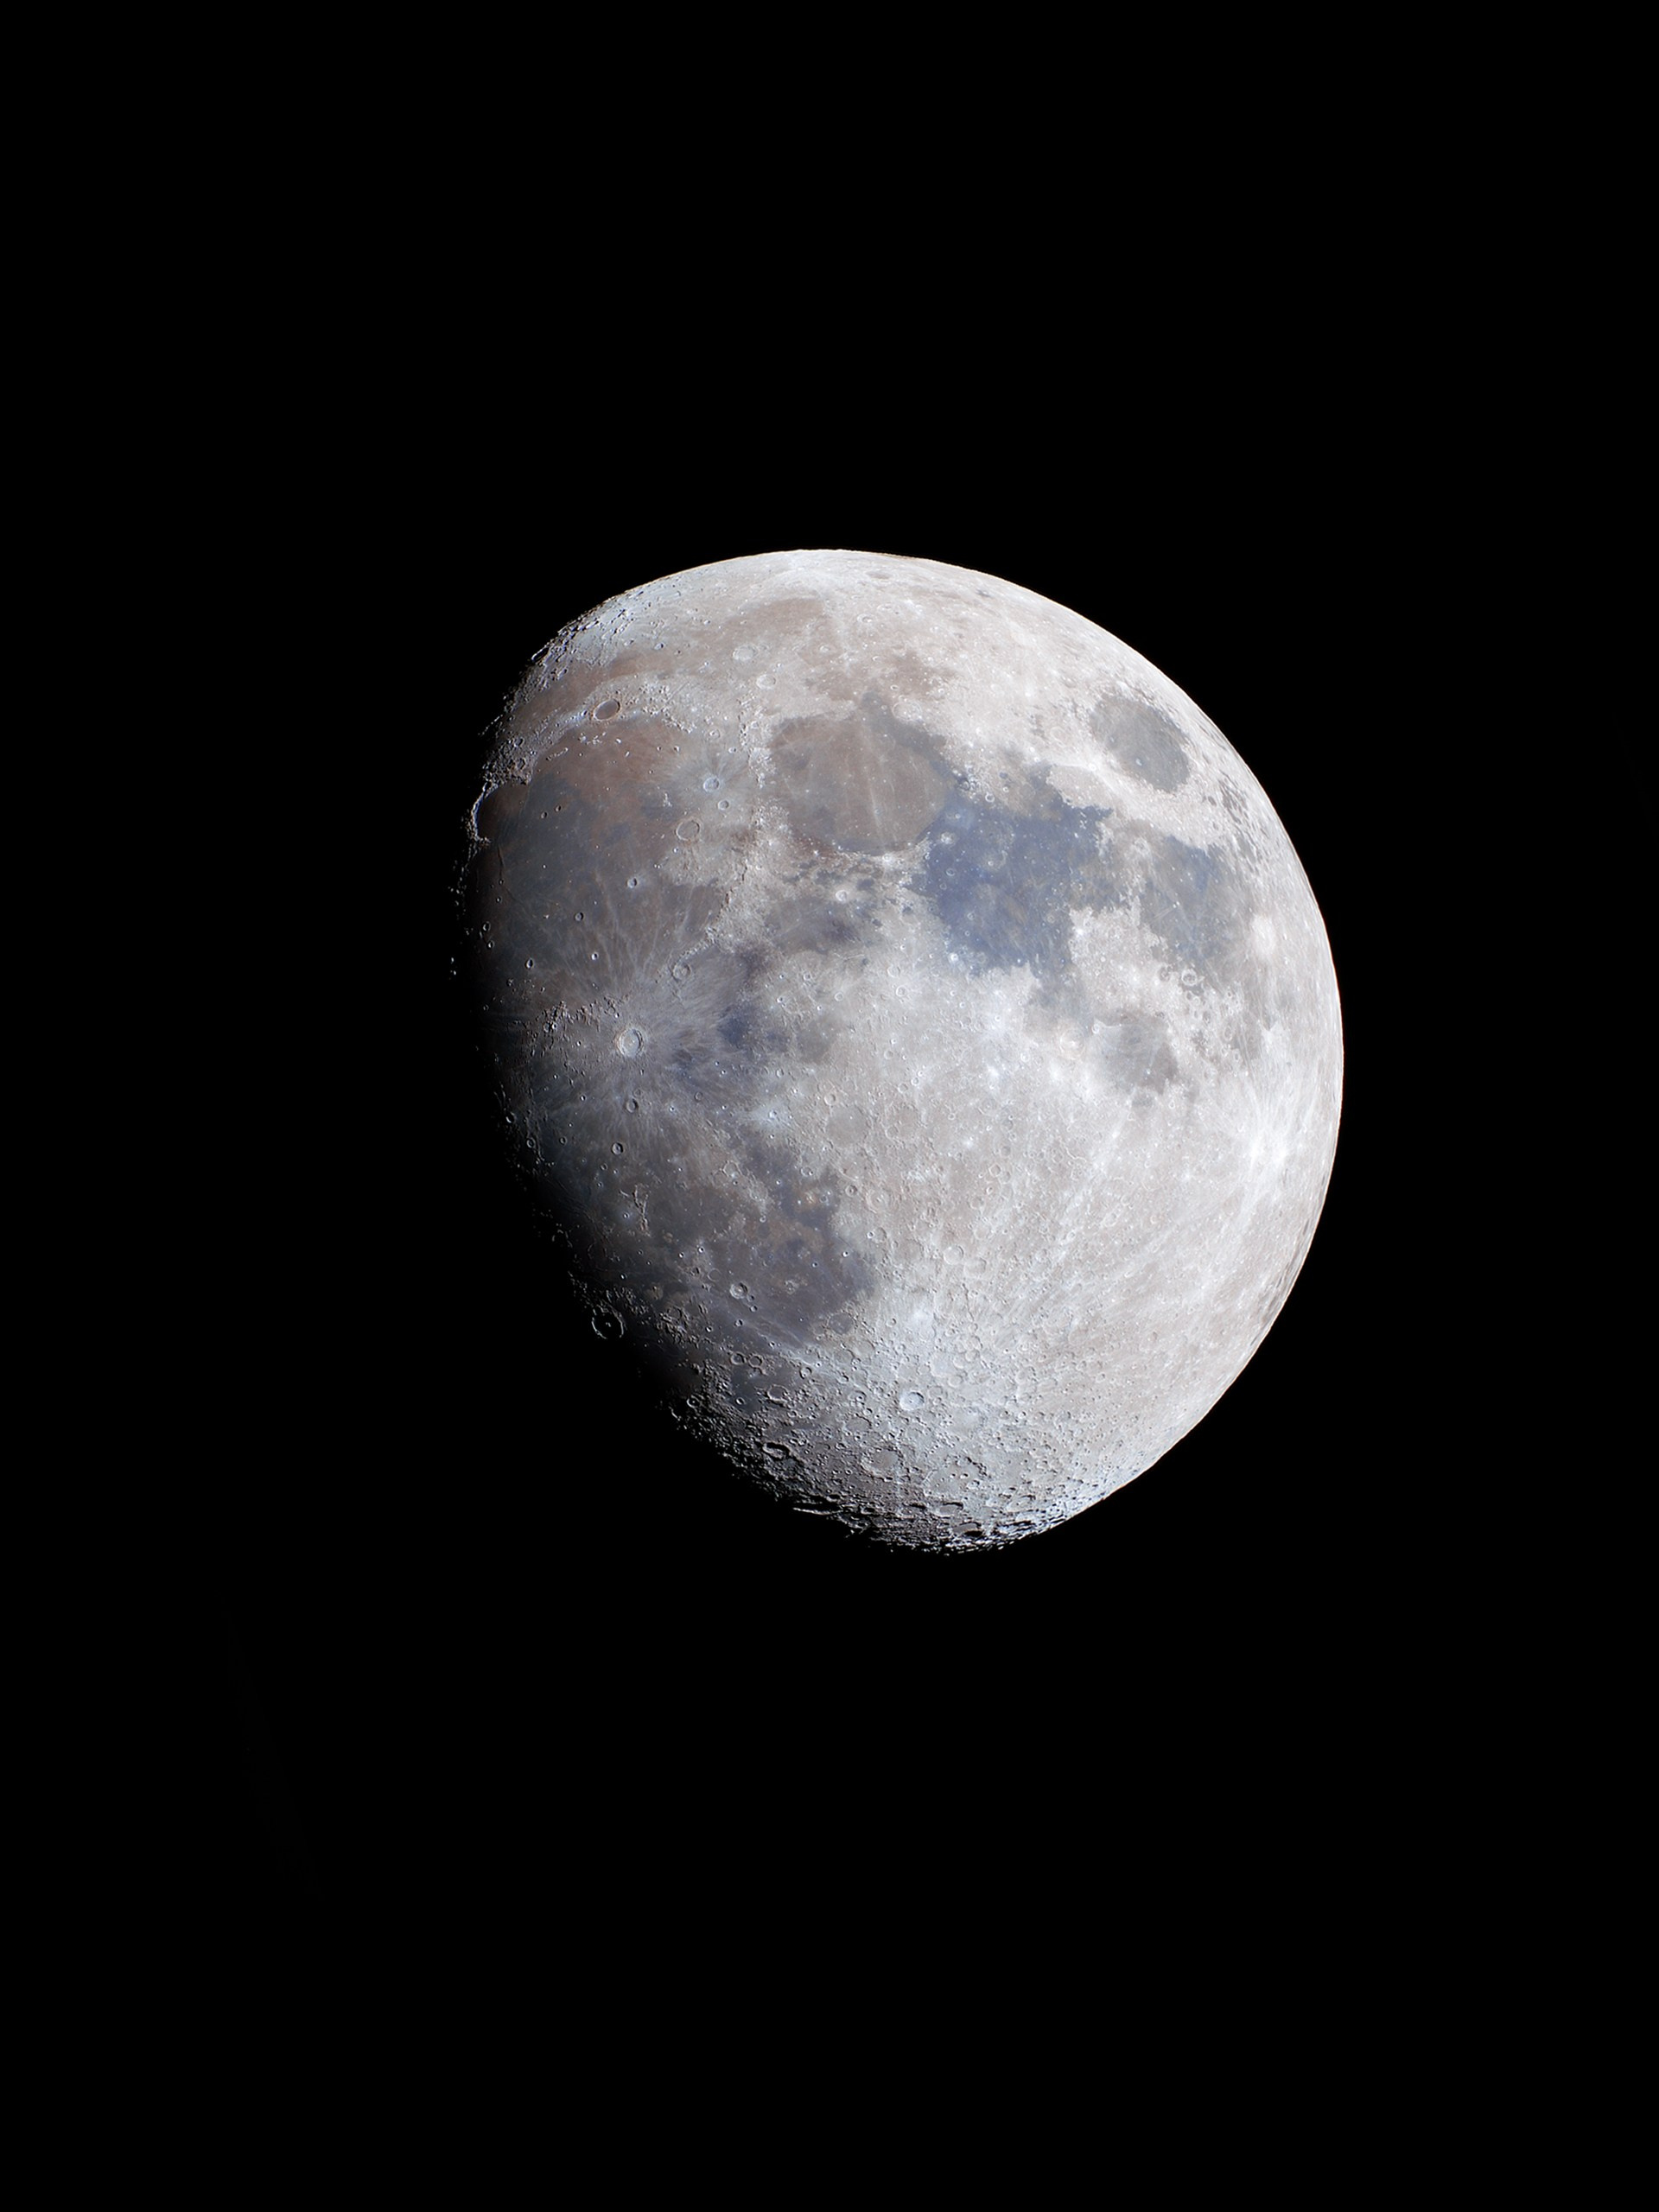
After completing this series of frames, we slightly increase the shutter speed and raise the ISO until the glow around the Moon is clearly visible (in the phase close to the new moon, we will be able to show the unlit side of the Moon, which will only be to our advantage). We shoot about 10-20 frames.
The shooting is over. And so we got two series of frames: one with details of the lunar surface, the other with a glow. Let’s figure out which image components still need to be photographed to assemble the HDR Moon.

The area highlighted in red is the surface of the moon “with details” — our very first series of frames.
The yellow glow area is the second series of frames.
The green area is the shadow side of the moon, which is a separate part of the full moon.
A little bit about the “green area”. The shadow side of the Moon can be shown in phases of no more than 30-40% along with the glow, then there will be no urgent need to “photoshop” the shadow side from a previously captured full moon, however, in phases close to the full moon, the illuminated side will completely overlight the shadow side, and there will be no way to show the shadow side, so you will have to use previously captured material, and exactly, as I said earlier, the full moon phase, captured and stacked according to the same pattern as our first series of photographs.
Let’s move on to processing the received material, first of all, to adding up the frames.
Processing
We will need four programs: PIPP, AutoStakkert! , AstroSurface, Photoshop.
First, open PIPP, follow the instructions.
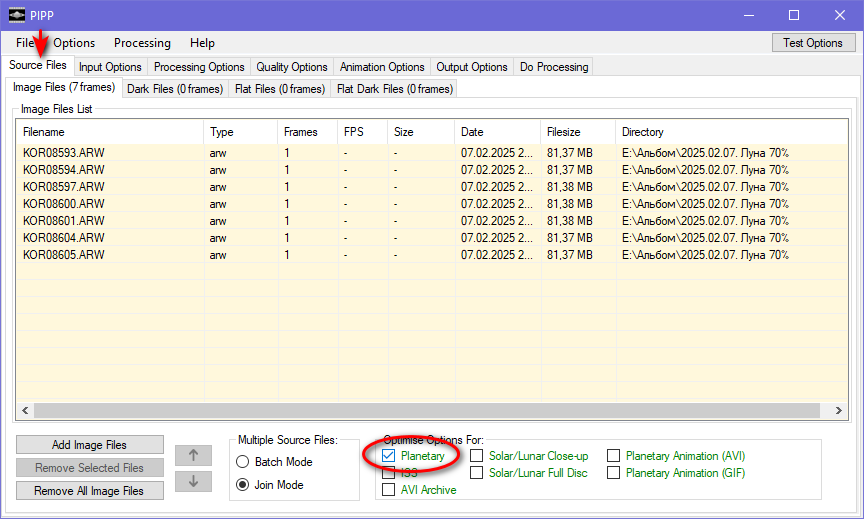
Upload all the captured files (RAW only) to the program. In the lower panel, specify the “Planetary” object detection mode

In the “Processing Options” tab, specify the number of pixels on both sides of the image and, if necessary, raise the “Gain” value. After changing the settings, click the “Test Options” button in the upper-right corner. All actions will be displayed in a separate preview window.
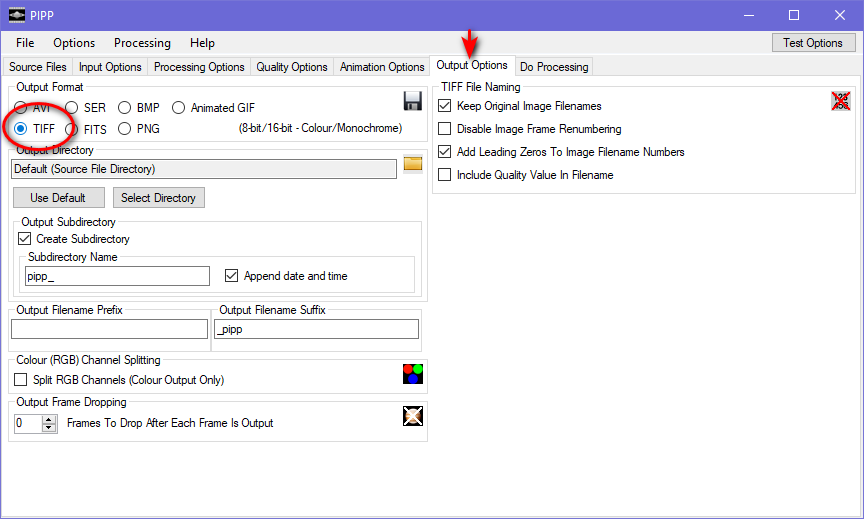
In the penultimate tab “Output Options”, select the output file format TIFF.
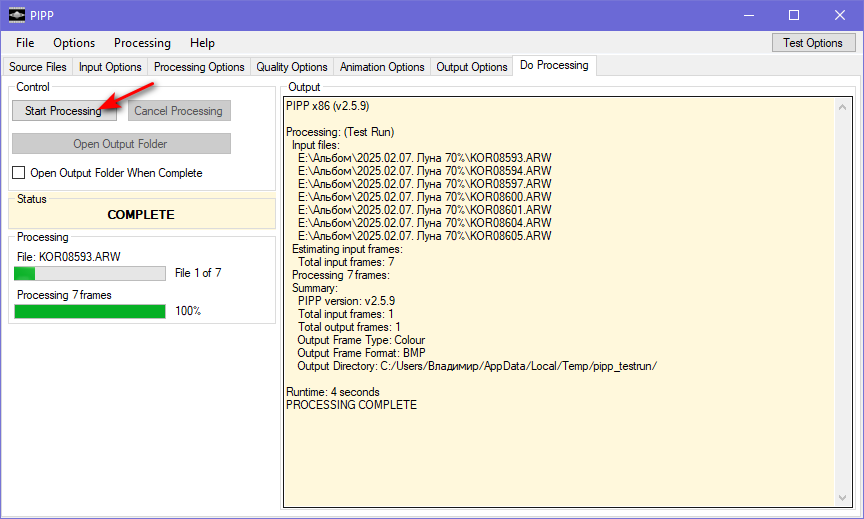
We don’t change any more settings, select “Start processing” in the last tab and wait for the process to end.
After completing the process, we receive a folder with tiff files. The moon in each frame is exactly in the center with an accuracy of several pixels. Let’s move on to adding up these frames.

Open the AutoStakkert! program. I am using the 4th version, the interface may vary from version to version. We download the tiff files received after the PIPP program.
After opening the images, we will see a preview window with a green anchor square. With the Ctrl key pressed, click on the most contrasting area on the Moon’s disk. This is necessary to align the images relative to each other again.

In the settings window, we set everything as shown in the screenshot.
In the Stack Options settings, we set the number of frames that the program will select and add. I advise you to set from 10 to 30%, so the program will filter out most of the “soap” frames and add up the most successful ones.

Click the “Analyze” button. The program will review all the frames and arrange them in the order of deterioration. The frame quality will be shown on the graph (green line). By clicking anywhere on the right side of the graph, you can see a preview of a particular frame and make sure that it is worse than those frames that are located on the left side of the graph.
Then you need to set the reference points on the image.

On the left side of the preview, select the size of the checkpoint and click “Place AP grid”. The program will place dots all over the moon’s disk, and their number will be written just above. To reduce the addition time, I advise you to choose the size of the control points so that their number does not exceed 5000-7000.

After arranging all the points, we will see something like this picture.
Click the “Stack” button
Having received the Moon stack, we open the latest program for processing the Moon’s surface “with details” — AstroSurface.

Open the resulting stack in the program: “Files — Open File SER-AVI RAW Digital” (Ctrl+O).
Click the “+” button in the upper Zoom panel, zoom in on the image so that the details are clearly visible. Then open “Wavelets” and left-click on any area of the Moon with textured craters to better see the settings being applied.

The tools that affect the “sharpness” are on a blue and green background. The settings for each stack are individual, so we select such values to show as much detail as possible, but the main thing is not to overdo it.
A “too sharp” moon is also not good.
After we have set all the values, we apply these settings to the entire image with the “Do All” button. If everything is fine, click “Ok” and save the image: “Files — Save As: Image or ROI” (Ctrl+Shift+S).
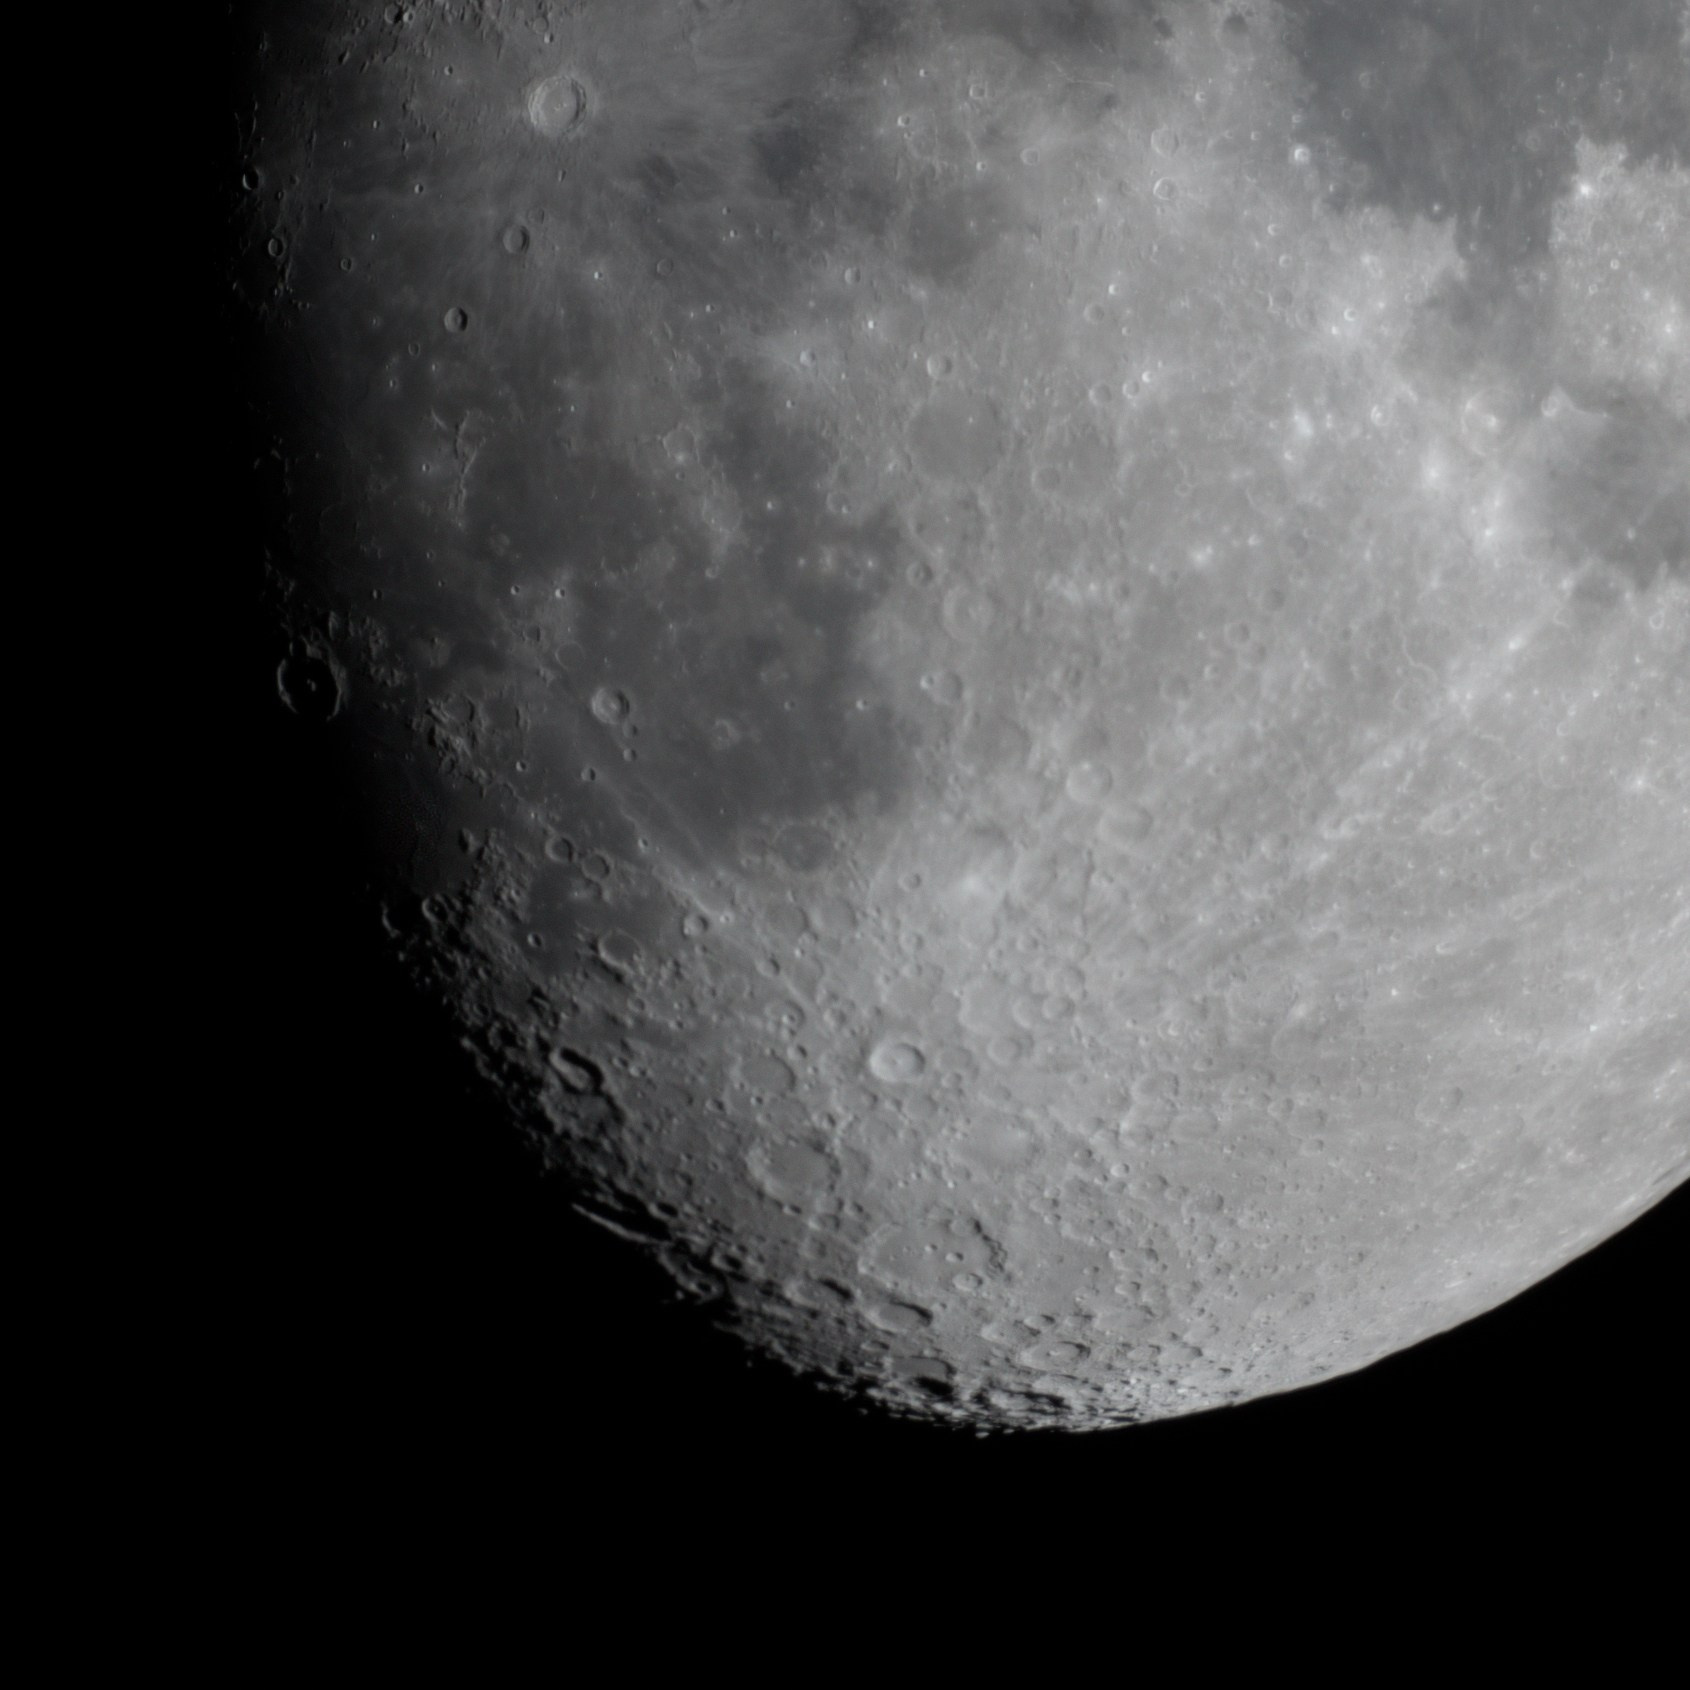
This completes the processing of the first series of “Moon surface ‘with details’” frames.
Go to Photoshop
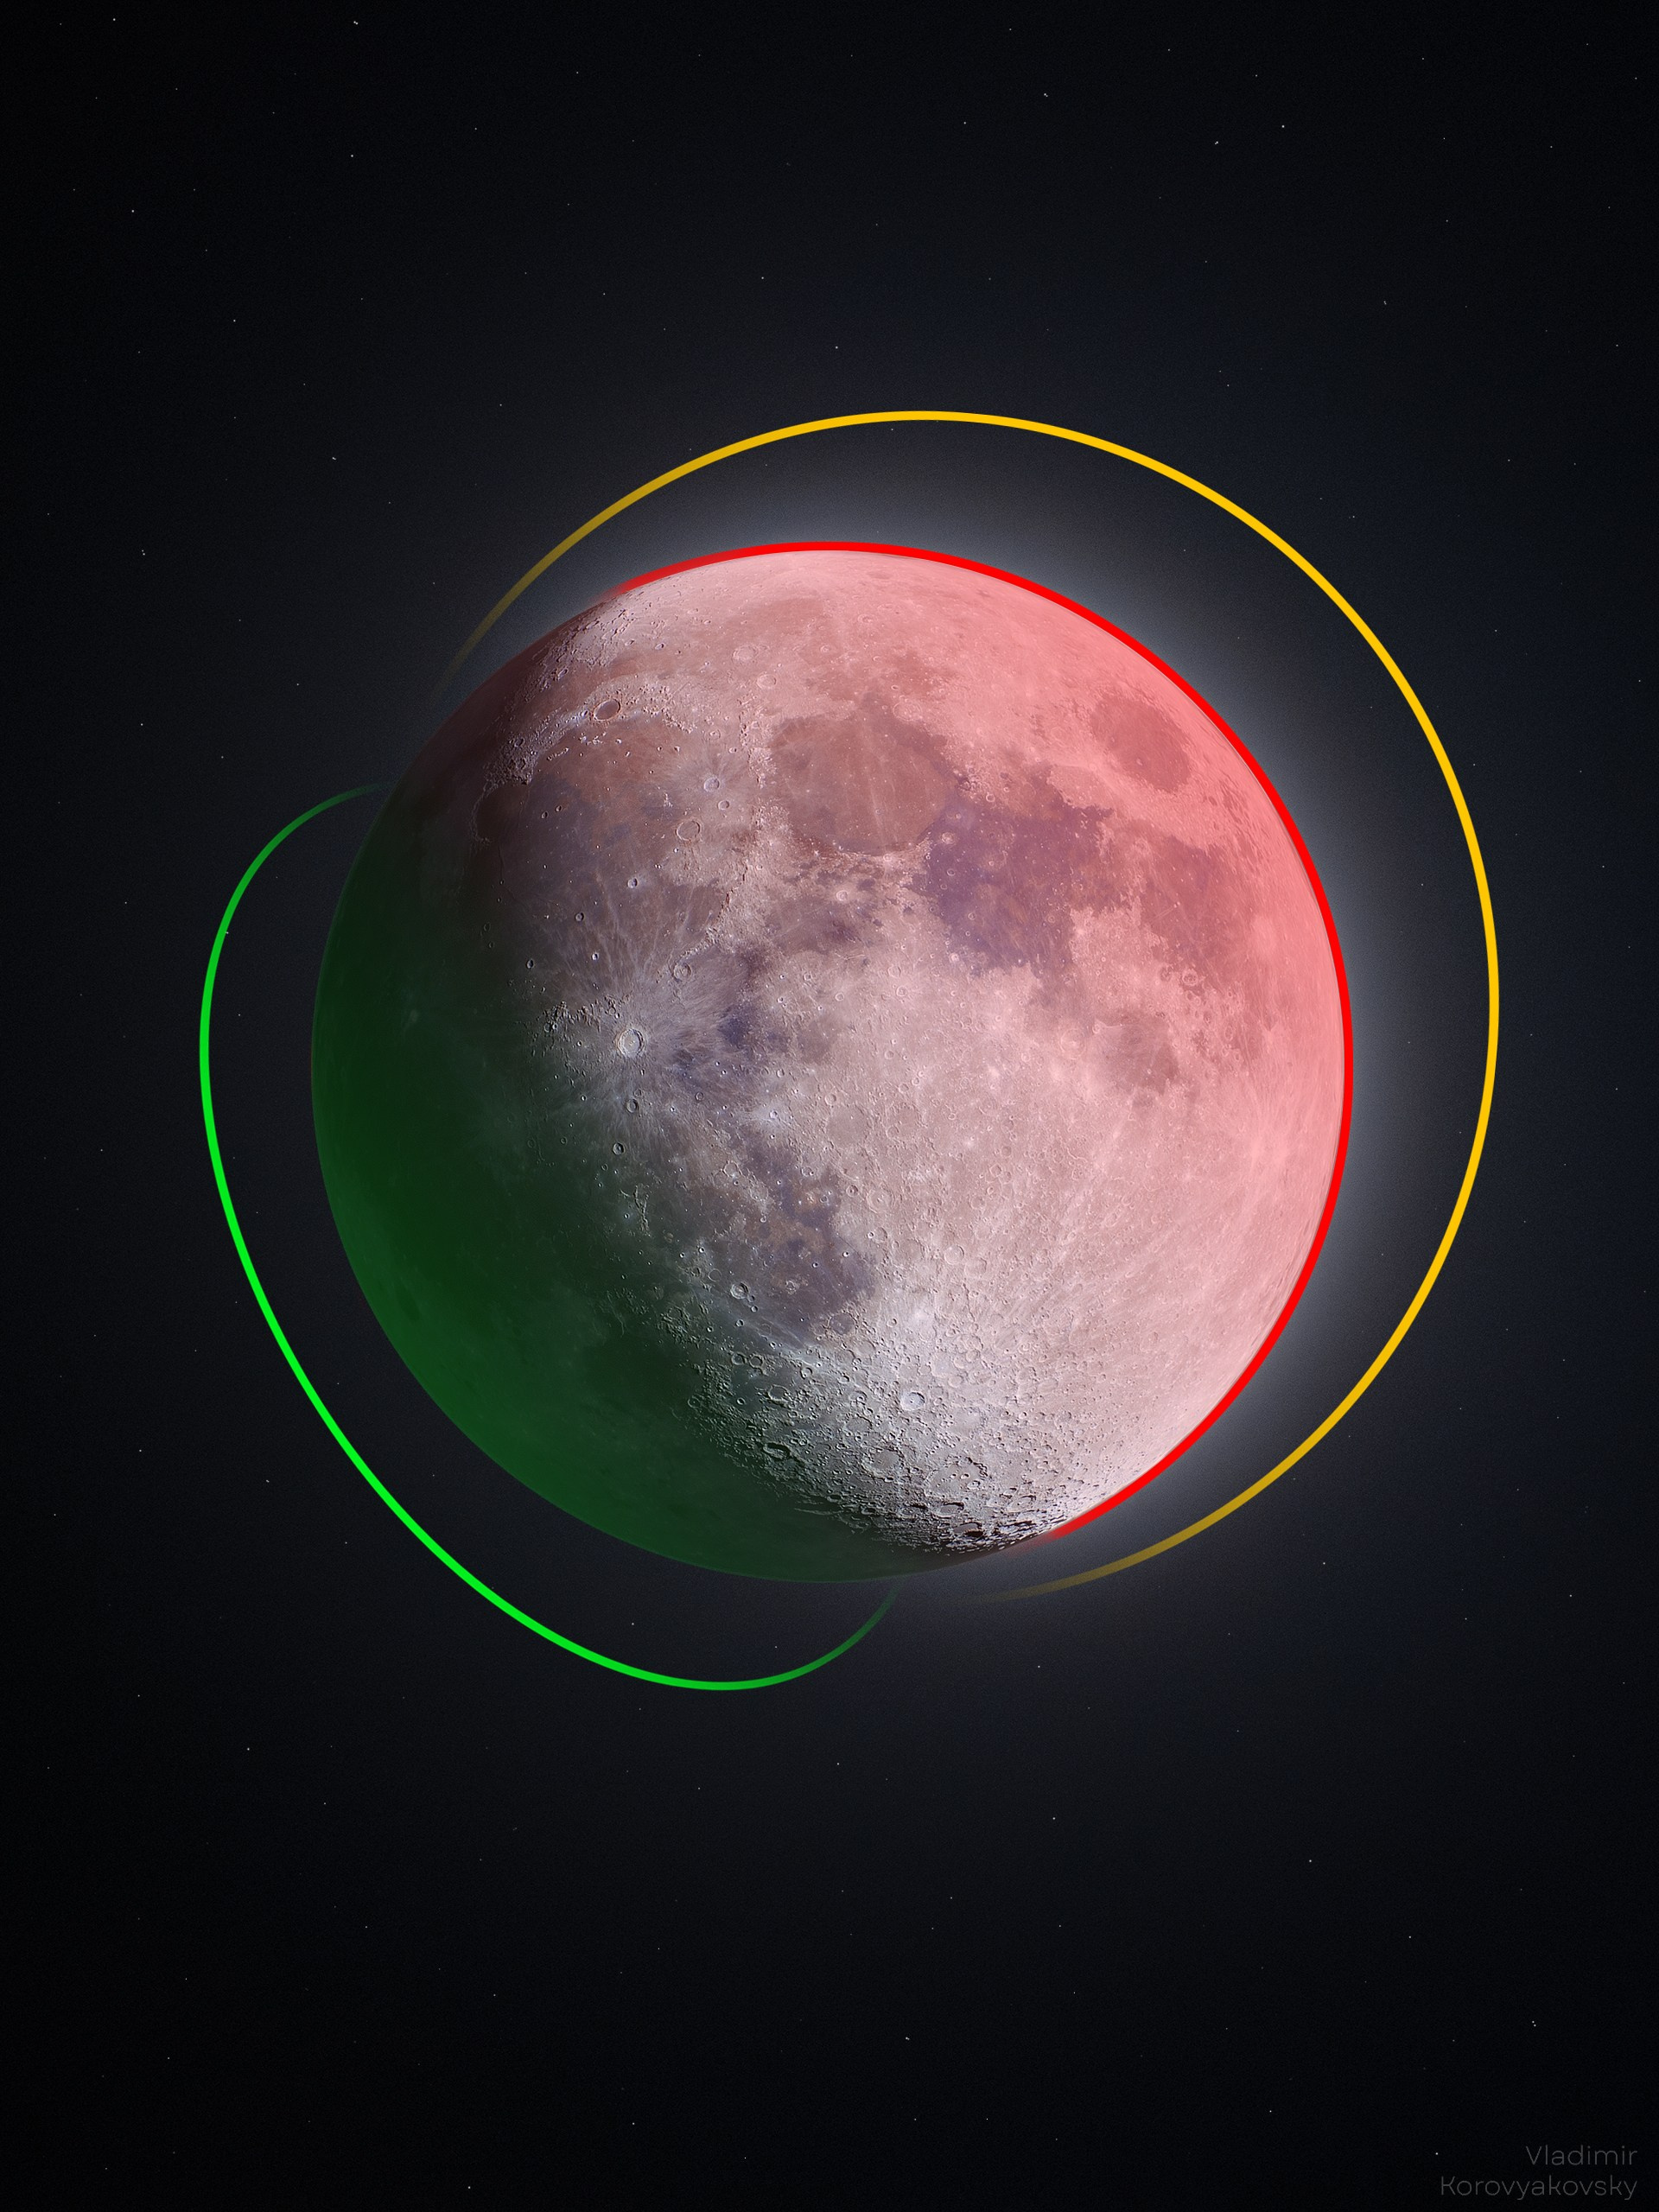
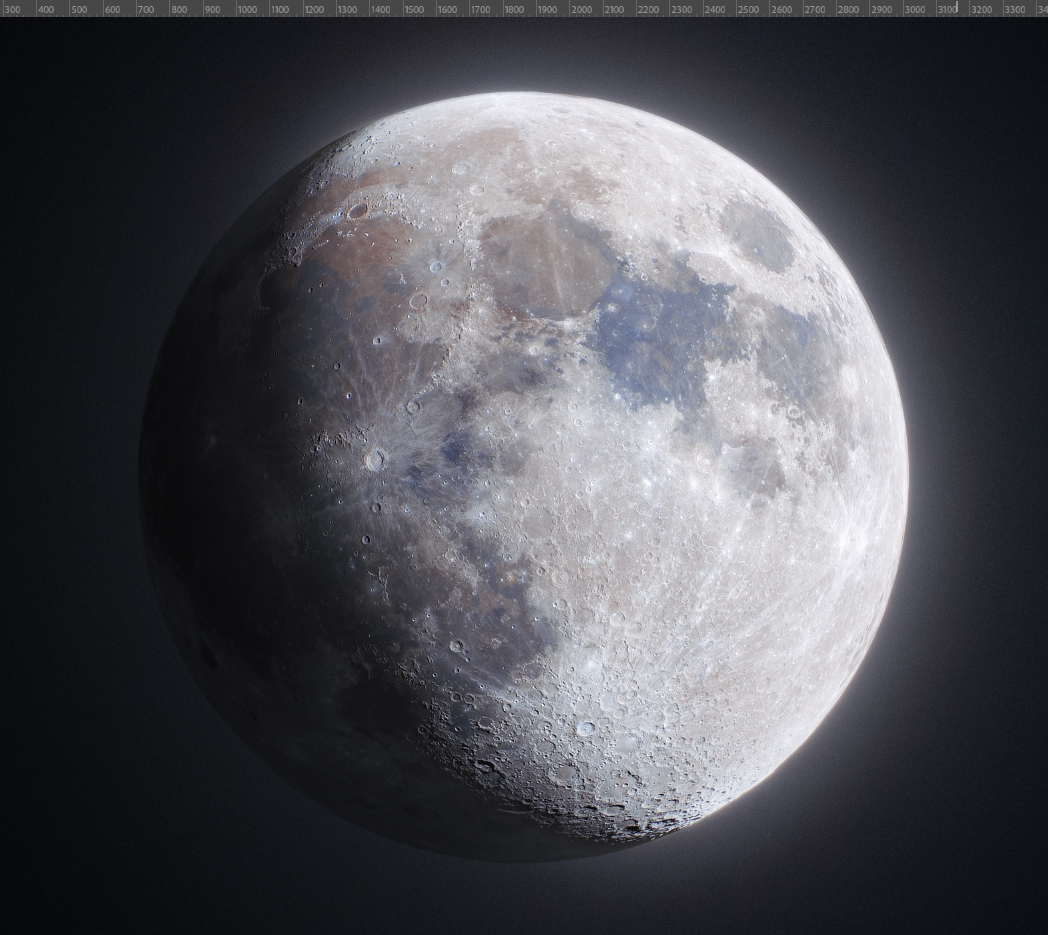
At this stage, the procedure and methods for achieving the result may vary slightly, but our main task is to make an HDR Moon by overlaying an image with details (red area) on the shadow part of the Moon (green area), preserving the glow around the illuminated side of the Moon (yellow area).

We open the result after AstroSurface (we will call it the “stack”). If desired, you can add color to the moon. To do this, open any single frame (in RAW) and overlay it on top of the stack. By the way, you can see how different the detail of a single frame and a stack is, after all, all the previous actions were done for a reason.
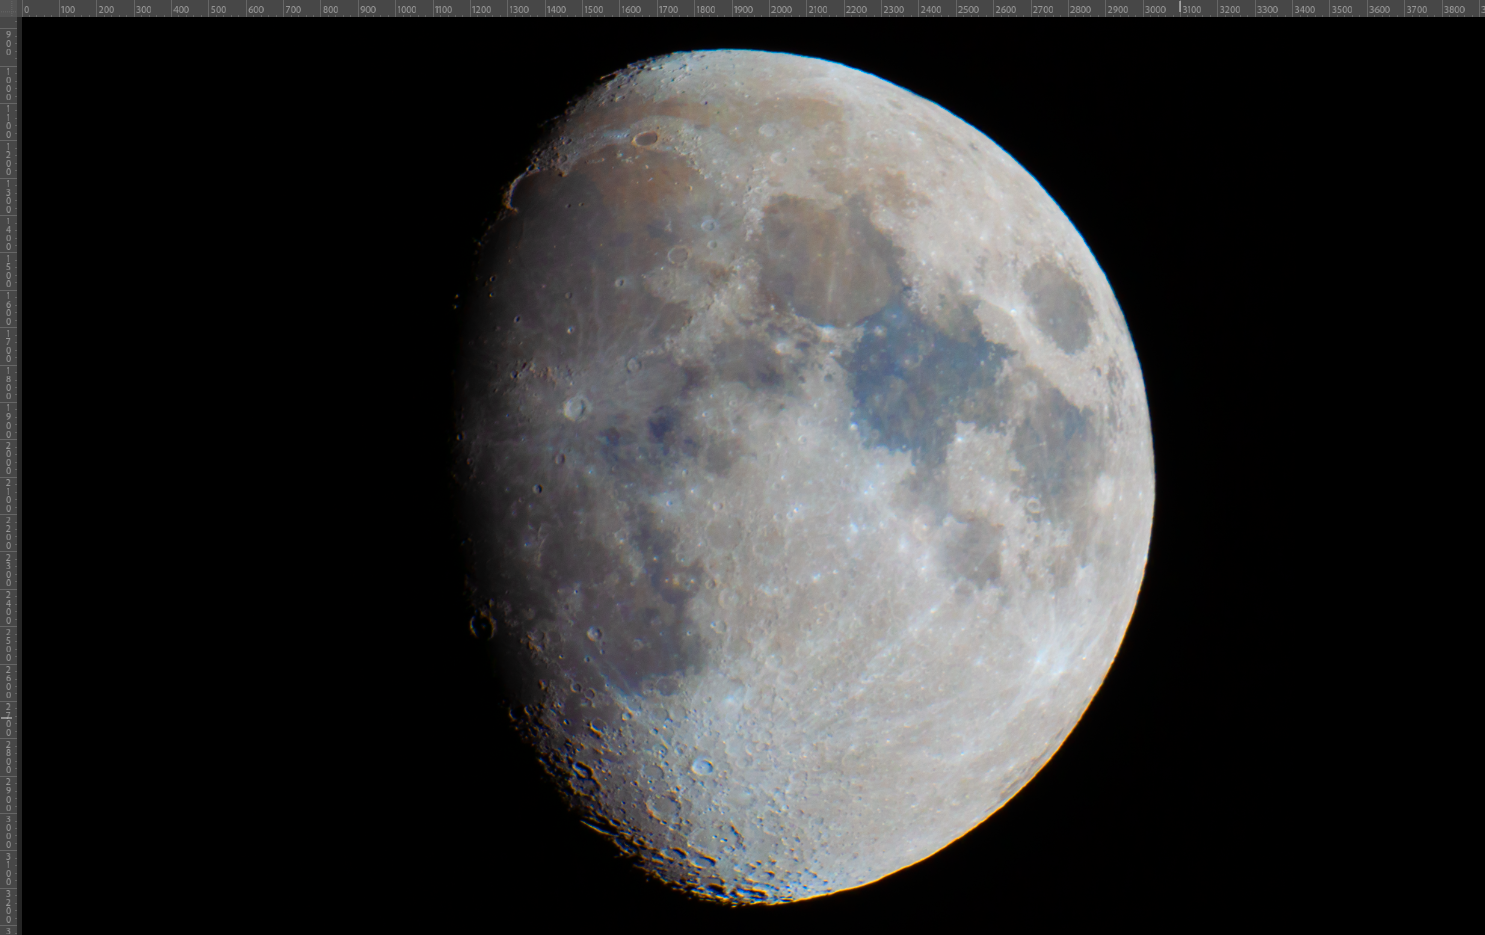
For a single frame, we raise the saturation by about 50 units. We repeat this action three or four times, in the end it should turn out something like this:
We apply a layer with a single frame in the “Chroma” overlay mode, adjust the transparency, if too many chromatic aberrations appear, add a white mask and draw the boundaries of the Moon with a black brush.

The result should be something like this. The illuminated side of the moon is ready, and now the most difficult thing is to apply the shadow side of the moon.

The “shadow side” will be made from pre-filmed footage of the full moon. We assemble the full moon stack according to the previously described algorithm in PIPP — AutoStakkert programs! — AstroSurface and open it in Photoshop. We will immediately reduce the contrast and brightness of the full moon, since we need it exclusively for the unlit side, and it a priori cannot be brighter than the illuminated one.
Now it is necessary to overlay the image of the illuminated side on the full moon as accurately as possible. And here we are faced with the first problem: it will not be possible to superimpose the two phases of the Moon with pixel accuracy due to its libration. I won’t go into the details of this phenomenon, we still have the task of collecting an HDR image. The problem will have to be solved by putting the full moon on the stack as accurately as possible, without using a “puppet transformation”.
After superimposing one “Moon on another”, it is necessary to remove the “unnecessary” part of the full moon with a mask, leaving only a piece of the “shadow” side. On the layer with the full moon, which is located above the layer with the illuminated side, we apply a white mask and draw the illuminated side with a black brush. We select the stiffness, size, transparency, draw the border exactly along the terminator (the Terminator is the light dividing line separating the illuminated (light) part of the cosmic body from the unlit (dark) part) and sketch the rest of the Moon. The difficulty lies in the need to preserve as many details of the illuminated side of the moon as possible, but also to prevent black holes on the terminator line. I have not found any ways to simplify this stage, creating a mask using channels is almost useless: the mask turns out to be torn and needs to be improved, so in any case, you just have to draw the illuminated side evenly and carefully with a brush.

I got this mask.

And this is the result with this mask.
As you can see, there is still an uneven transition to the shadow side of the Moon on the terminator line, this should not be the case (and the shadow side is not dark at all), so we also lower the exposure of the full moon. In addition to lowering the exposure, I would also reduce the amount of visible details on the “shadow” side. To do this, create an empty layer and fill it with black. Create a clipping mask (left-click between the fill layer and the full moon layer, with Ctrl pressed). Adjust the transparency of the layer so that the “shadow” side is not completely black, but at the same time, it is not too bright.

We get this image. Half of the work is done. Now it is necessary to overlay the resulting image on the image with a glow around the illuminated side of the Moon. We shot the glow immediately after the first set of shots.
We overlay the image and align it with reduced transparency relative to the glow. Since we haven’t cropped anything yet, it should work out without any problems. We create a mask using guides and an “oval area”.

We pull the guides to the upper and left sides of the lunar disk, as shown in the screenshot, and from their intersection with the clamped Shift, we pull the oval area down to the right.
We try to get this selection circle exactly along the boundaries of the Moon. Click “create a mask” and see how smoothly the Moon was cut out.

If similar black borders appear, we redo the mask by stretching the circular selection area from the intersection of the guides in the same way. Ideally, there should be a circle that will cut out the moon exactly along the contour.

This image is obtained. Then use a soft transparent brush to stroke the edge of the illuminated side a couple of times to create a gradient between the edge of the lunar disk and its center.

The mask should take on a similar appearance.
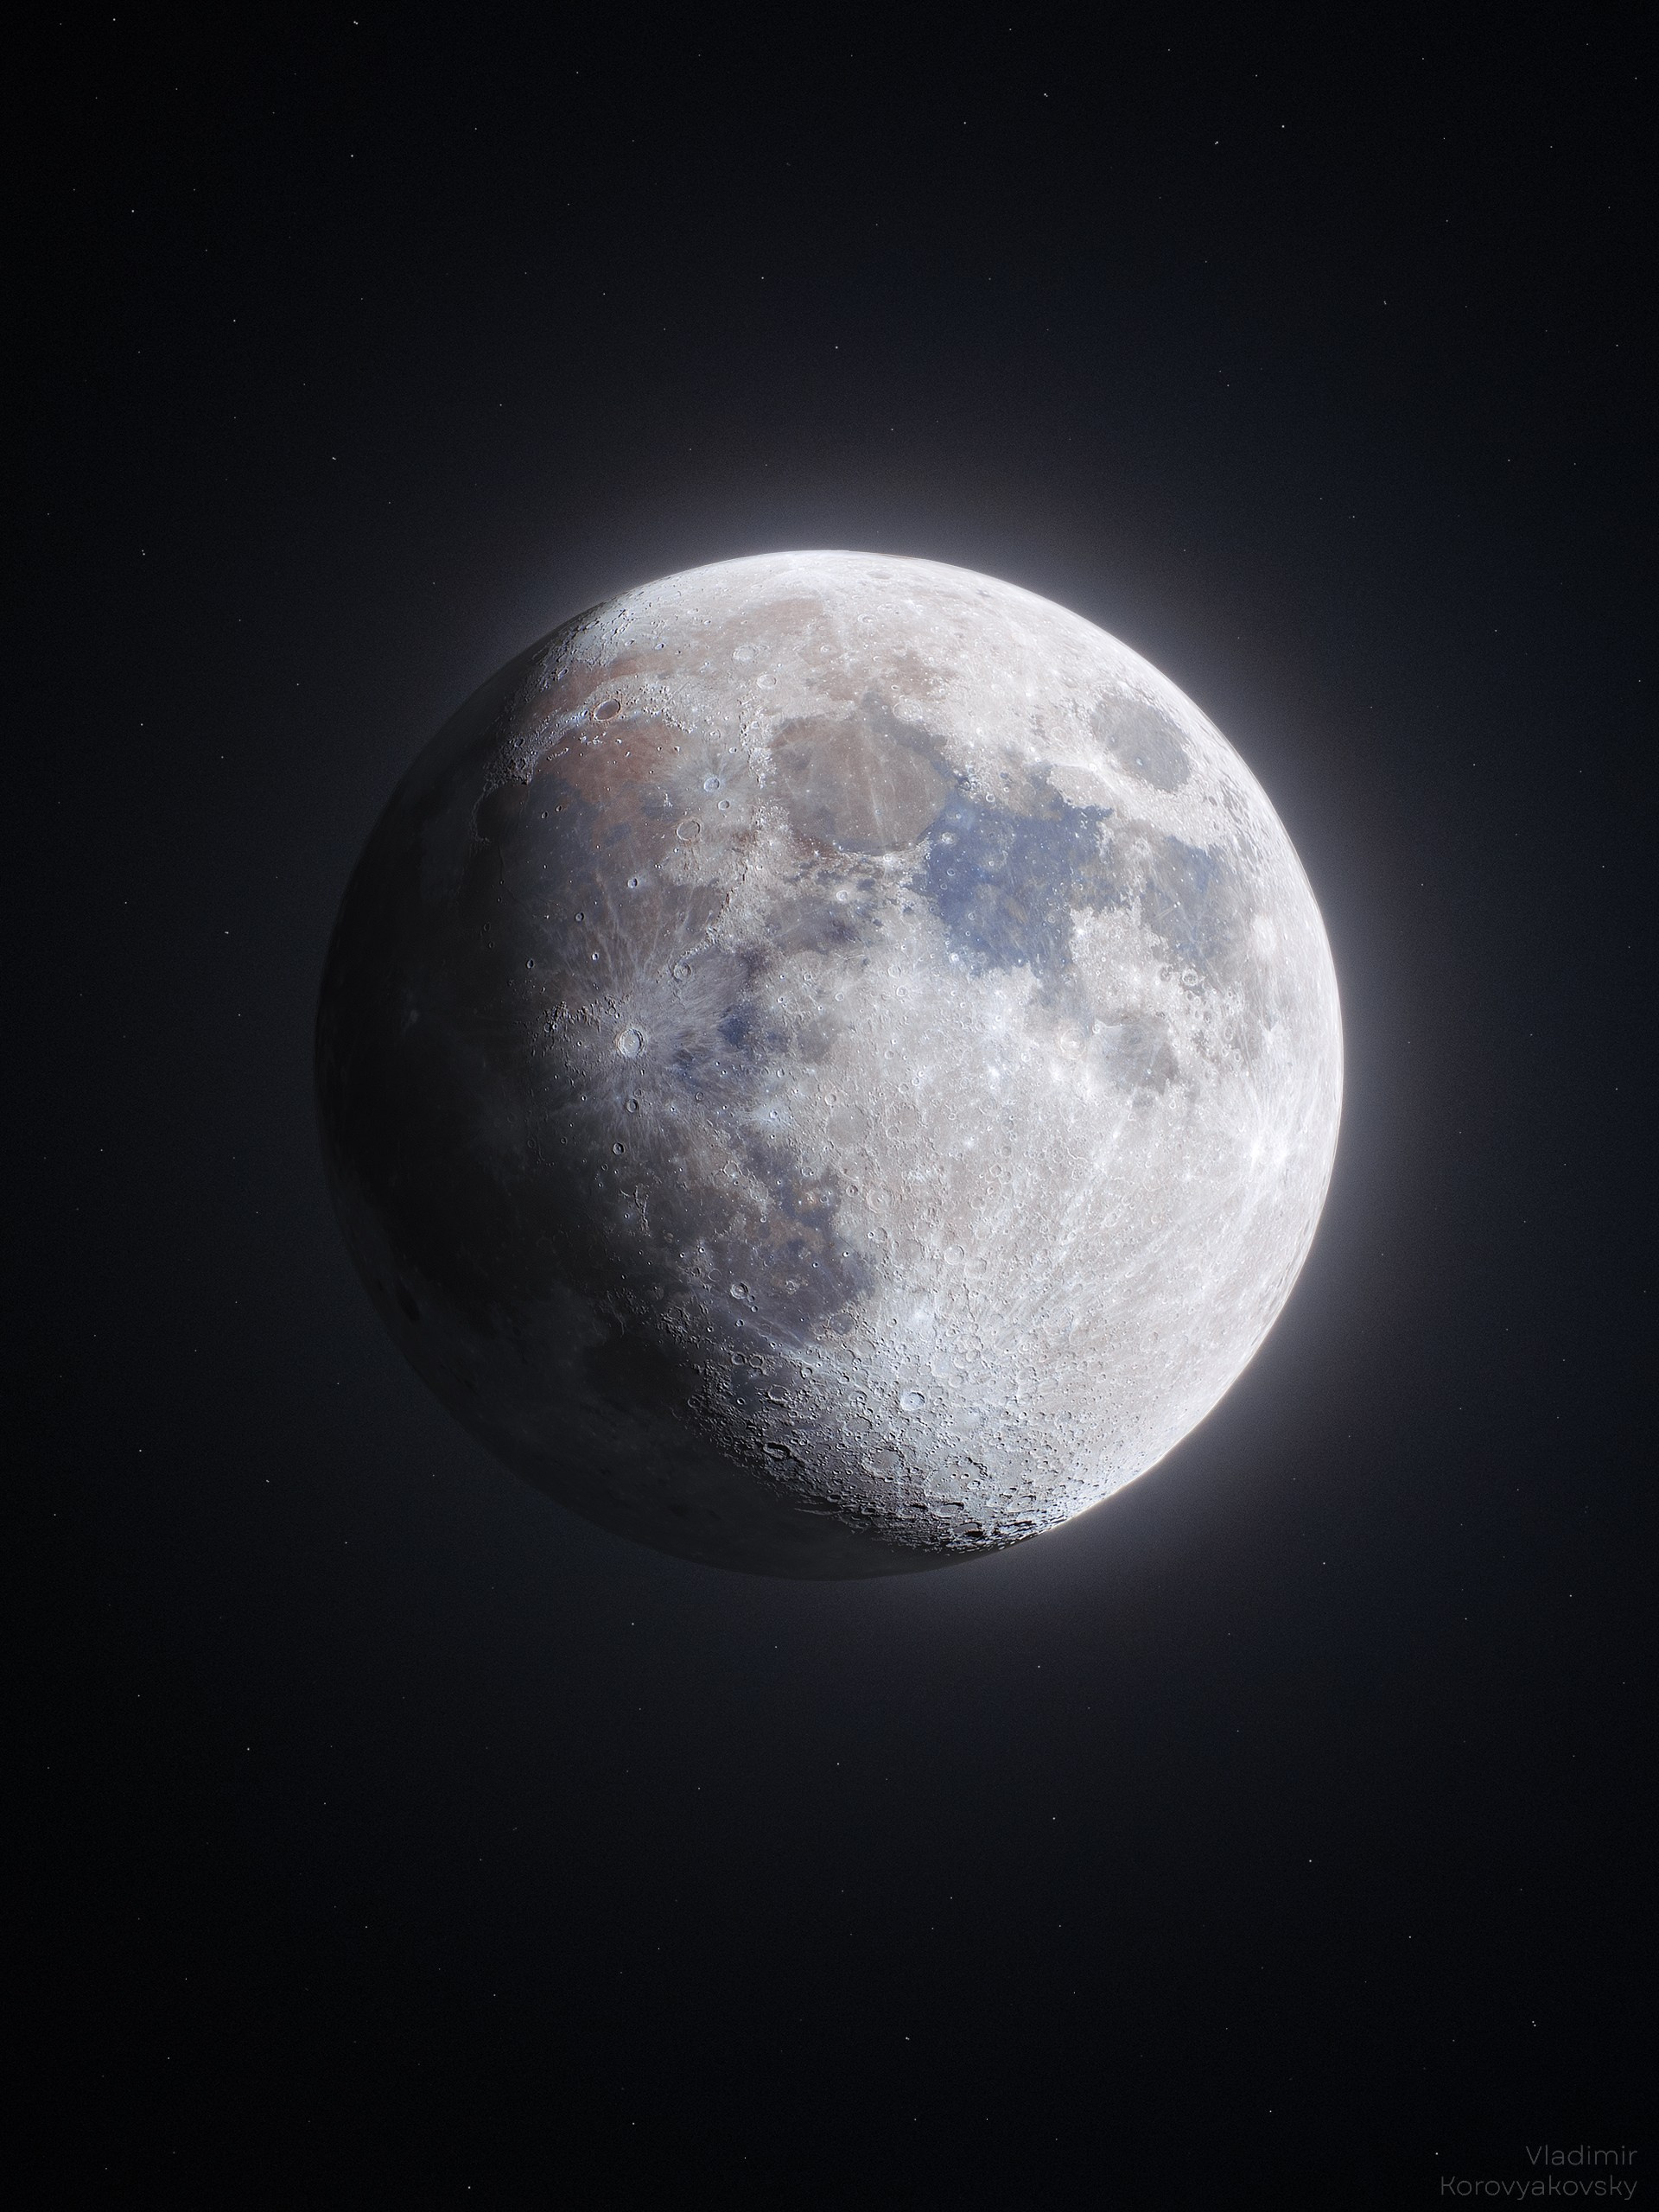
In general, the HDR image is ready, it remains only to slightly refine the background and adjust the color, if necessary.
Create an empty layer between the Moon and the glow, and add a white radial gradient.
There will be a slight glow from the unlit side of the moon, perhaps it looks a little unnatural, but in fact this glow is really present.

If desired, you can overlay the stars, just like the full moon, captured earlier. But ideally, to create the most plausible image, you should shoot the stars at the same focal length in the same area of the sky where the Moon was at the time of shooting the first episode, and since not everyone (including me) has this opportunity, you can cheat a little and add any stars available in the archive. For this purpose, I chose a series of shots on the area of gas and dust clouds in the Cepheus area. I pre-stacked about 150 frames in the DeepSkyStacker program, separated the stars from the background in PixInsight and overlaid them on top of the Moon. I will not attach screenshots, as, most likely, there will be a lot of questions, and the processing of photos of deep space is already the topic of a separate article.

As a result, such an image is obtained, something can undoubtedly be improved, some actions can be optimized, and creativity begins here.